


Views: 0 Author: Site Editor Publish Time: 2026-06-29 Origin: Site


Navigating poorly marked electrical panels carries steep operational and safety costs. Opening a complex enclosure should never feel like defusing a bomb. Countless facilities still struggle to track where every circuit leads. Relying on legacy panel schedules or trial-and-error breaker flipping introduces massive risks. You invite immediate code violations and extended maintenance downtime. More importantly, these outdated practices expose you to severe arc flash or electrocution hazards. We must establish a reliable, verifiable methodology for tracing circuits accurately. You will learn how to systematically audit your enclosures and deploy permanent, compliant labeling systems. This guide breaks down safe diagnostic workflows. It also outlines exact material choices to keep your infrastructure safe, highly organized, and completely up to code.
Verification over assumption: Never trust existing panel directories or wire colors without active multi-meter or circuit tracer verification.
Compliance is mandatory: NEC (Article 408.4) and OSHA require clear, legible, and durable circuit identification for all panels.
Material matters: Standard masking tape degrades; purpose-built wire identification labels are required for long-term safety and facility compliance.
Systematic approach: Proper cable identification requires a two-phase approach: diagnostic tracing and permanent physical labeling.
Proper Cable Identification forms the bedrock of facility safety and regulatory adherence. The National Electrical Code (NEC) outlines strict mandates regarding panel documentation. NEC Article 408.4(A) dictates every circuit must be distinguishable by its specific purpose. Vague labels fall short of this standard. Writing "Lights" or "Plugs" on a directory card violates compliance. You must specify exact locations, such as "South Office Receptacles" or "Warehouse High-Bay Lighting." Inspectors look for clear, descriptive language avoiding transient conditions. If a designated room changes purpose, you must update the documentation immediately.
Operating a facility using guesswork presents severe hazards. Imagine accidentally shutting down critical infrastructure. Flipping the wrong breaker could kill power to server racks, medical life-support systems, or active manufacturing lines. Unplanned outages trigger costly operational delays. Conversely, energizing the wrong circuit while technicians perform downstream maintenance can result in fatal electrocution. Precision in panel labeling removes these life-threatening ambiguities.
Legacy systems carry a massive trust deficit. You should never assume an existing panel schedule remains accurate. Decades of undocumented downstream modifications render old directories useless. Previous maintenance teams often tap into existing lines. They shift loads between breakers. They rarely take time to update the paper card attached to the panel door. Over time, the physical wiring deviates entirely from the recorded schedule. Treating older documentation as absolute truth creates dangerous scenarios for anyone servicing the enclosure.
Establishing accurate labels requires a methodical diagnostic workflow. You must trace unmarked wires systematically. We start by reviewing standard color-coding guidelines. In North America, electricians typically use black, red, and blue wires for 120/208V systems. They use brown, orange, and yellow wires for 277/480V systems. Green always denotes ground. White or gray indicates neutral. However, consider these colors as indicators rather than guarantees. Subcontractors sometimes pull whatever wire spool they have available. A black wire might carry 277V in a poorly managed system. You must verify every single conductor.
Hardware-assisted tracing accelerates the discovery process. Electricians rely on several key tools to map out complex enclosures:
Digital Circuit Breaker Finders: These tools pair a plug-in transmitter alongside a handheld receiver wand. The transmitter sends a specific frequency through the line. You sweep the wand across the panel breakers. It beeps upon finding the exact match.
Tone Generators: Technicians use these for de-energized lines. You attach the generator to the downstream wire. You then use an amplifier probe inside the panel to locate the singing wire.
Continuity Testers: These confirm direct point-to-point physical connections. They work effectively over shorter distances ensuring unbroken paths.
Implementation realities force us to choose between live and dead testing. Tracing live circuits allows facilities to remain operational. It requires specialized inductive clamps capable of reading energized lines safely. However, toning de-energized lines provides a much safer environment. You eliminate arc flash risks entirely. Facilities must balance operational uptime against technician safety when selecting a tracing method.
Safety Disclaimer: Physical verification using a properly calibrated multimeter remains the only definitive proof of a de-energized state. Never trust non-contact voltage pens for final safety confirmations. Always test your multimeter on a known live source before checking the target circuit. Proceed only after confirming absolute zero voltage across all phases.
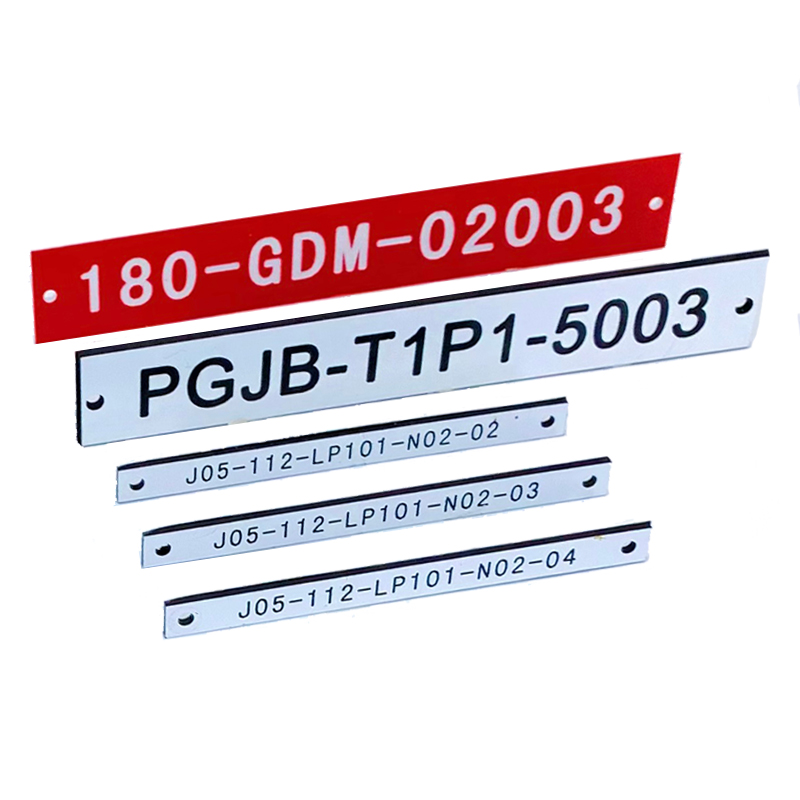
Temporary solutions fail catastrophically inside electrical panels. Many amateurs reach for standard masking tape, electrical tape, or plain paper labels. They write on them using permanent markers. These ad-hoc methods cannot withstand harsh panel environments. Enclosures generate significant internal heat. They experience ambient moisture fluctuations. Wires rub against each other due to subtle magnetic vibrations. Within months, masking tape turns crispy and falls off. Marker ink fades into illegible smudges. Relying on inadequate materials wastes the effort spent tracing circuits.
You must invest in industrial-grade wire identification labels. Manufacturers engineer these products specifically for challenging electrical environments. We generally categorize them into three main types:
Self-Laminating Labels: These work perfectly for existing terminations. A printed white area holds the text. A clear tail wraps around the wire, sealing the printed section beneath it. The lamination protects the text from oil, dirt, and abrasion.
Heat-Shrink Sleeves: These offer maximum durability. You slide the polyolefin sleeve over an unterminated wire. Applying heat shrinks it tightly around the insulation. It provides permanent identification and adds a layer of dielectric protection. Best used during new installations.
Wrap-Around/Flag Labels: These fit well in tightly packed commercial enclosures. The label forms a flag sticking out from the wire. This makes the text readable without twisting or pulling the conductor.
Matching label materials to environmental stressors guarantees long-term visibility. Different compounds react uniquely to temperature, chemicals, and physical friction. The following table maps specific materials to their ideal applications.
Material Type | Primary Characteristic | Best Use Case | Environmental Resistance |
|---|---|---|---|
Vinyl (Self-Laminating) | Highly flexible, conforms to curves. | Standard panel wiring, existing installations. | Resists oil, water, and mild abrasions. |
Nylon Cloth | Aggressive adhesive, highly tear-resistant. | Flag labels, rough or textured wire jackets. | Handles extreme friction and vibration. |
Polyolefin (Heat-Shrink) | Permanent 360-degree bond, insulating. | New terminations, heavy industrial feeds. | Survives high heat, chemicals, and UV exposure. |
Systematizing your panel requires more than just applying stickers. You need scalable, standardized naming conventions. Ambiguous terms create confusion during emergencies. A robust nomenclature system follows a logical path. Consider formatting tags as "Panel ID - Breaker Number - Room/Equipment". For example, a label reading "PNL-A-12-HVAC" tells technicians exactly what they are handling. Anyone reading it knows it originates from Panel A, sits on breaker 12, and feeds the HVAC unit. Consistency across the entire facility reduces troubleshooting time significantly.
Tackling an undocumented legacy panel requires a structured rollout process. Rushing this audit leads to costly mistakes. Follow these step-by-step lessons for auditing and relabeling an older gang box:
Perform an Initial Audit: Photograph the existing panel layout and current directory card before touching anything.
Schedule Downtime: Coordinate with facility managers to allow for safe, de-energized tracing across different zones.
Trace and Verify: Use digital tracers to map each conductor. Confirm the endpoints physically.
Document Digitally: Record all verified routes into a spreadsheet. Create your standardized naming tags in software.
Apply Physical Labels: Attach durable tags to individual wires inside the enclosure. Ensure texts face outward for easy reading.
Mount the Final Directory: Print the updated panel schedule on heavy cardstock. Secure it firmly inside the panel door.
Do not ignore the neutral and ground wires. Identifying the hot wire solves only half the problem. Modern electrical codes require Arc-Fault Circuit Interrupters (AFCI) and Ground-Fault Circuit Interrupters (GFCI). These specific breakers monitor imbalances between the hot and neutral legs. They require dedicated, perfectly matched neutral connections. If you share a neutral across multiple AFCI circuits, they will trip continuously. Labeling corresponding neutrals exactly as you label the hot wires prevents these frustrating integration errors. Grouping them physically using zip ties further clarifies the circuit structure.
Selecting the right tools depends entirely on your project scale. Small residential jobs do not demand heavy-duty equipment. Pre-printed wire marker books serve low-volume needs perfectly. These booklets contain pages of adhesive numbers and letters. You peel them off and wrap them manually. They work great for single-panel residential upgrades. However, large commercial projects require efficiency. Industrial portable label printers dominate high-volume environments. These rugged devices print customized text on continuous rolls. They cut heat-shrink sleeves automatically. They speed up large-scale installations exponentially.
Compliance verification should drive your material choices. Ensure all selected products hold UL-recognized status. Underwriters Laboratories tests these materials rigorously against flammability and degradation standards. Local inspectors acting as the Authority Having Jurisdiction (AHJ) actively look for these certifications. Installing non-compliant, unrated plastic tags might result in a failed inspection. Facilities must present documentation proving their labeling systems meet local fire and safety codes.
Assessing your immediate needs dictates your next steps. Start by shortlisting tools. Build a basic circuit tracer kit if you only handle occasional maintenance. Include a reliable digital breaker finder, a multimeter, and a book of pre-printed numbers. If you manage multiple facilities, upgrade to an enterprise-grade labeling system. Invest in a portable thermal transfer printer and stock up on self-laminating vinyl cartridges. A well-equipped team audits panels faster and safer.
Project Scale | Ideal Hardware | Primary Media | Compliance Focus |
|---|---|---|---|
Residential / Low Volume | Basic Circuit Finder Kit | Pre-printed Marker Books | Basic Legibility |
Commercial / Medium Volume | Handheld Label Printer | Self-Laminating Vinyl Cartridges | NEC Article 408.4 adherence |
Industrial / High Volume | Desktop/Industrial Portable Printer | Polyolefin Heat-Shrink Sleeves | Strict UL-recognized components |
Effective cable identification fundamentally changes how you manage electrical infrastructure. It transitions a chaotic panel from a severe hazard into a highly maintained asset. Precise tracing and durable tagging eliminate the dangerous guesswork historically associated with panel maintenance. Facilities operating with clear documentation experience fewer accidental shutdowns and faster repair times.
Your upfront time investment in accurate tracing pays exponential dividends. Dedicating a weekend to systematically mapping your enclosures prevents future disasters. Implement these final action steps:
Audit your existing panels immediately and document all discrepancies.
Deploy standard naming conventions across your entire property.
Discard masking tape and transition strictly to industrial-grade labeling materials.
Update your paper directories every time you modify a downstream load.
A: Look for the thickest gauge wires entering the enclosure. They usually terminate at the top or bottom directly into the main breaker block. These feeders carry the entire electrical load for the panel. Treat this zone with extreme caution. The area ahead of the main breaker remains live and presents severe arc-flash dangers even when the main switch is off.
A: No. Standard consumer label makers use weak adhesives designed for flat office paper. They fail quickly inside electrical panels. Industrial-grade markers feature aggressive adhesives formulated to grip curved wire jackets. They also utilize materials resistant to panel heat, friction, and moisture degradation.
A: You must update schedules immediately upon any downstream circuit modification or addition. Never delay documentation. Best practice dictates printing and installing the new directory card before the electrician leaves the site. Immediate updates prevent dangerous inaccuracies from lingering.
A: Color codes vary significantly. North America generally uses Black/Red/Blue for 120/208V and Brown/Orange/Yellow for 277/480V. However, NEC standards, local amendments, and historical non-compliant installations often contradict these rules. You must always verify voltage physically with a multimeter regardless of the insulation color.


